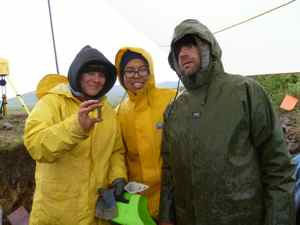
Remember how I said many days ago that archaeology was not for sissies. I need to amend that statement just a bit to read Arctic archaeology is not for sissies. Today we entered the realm of extreme archaeology. No, we weren't dueling with grizzlies or heading out into the wild without our Oreos. But when the rain started pelting my tent around 1:30am I knew that today was going to be a bit soggy.
I started by putting on all the clothing layers that I have been staring at and wondering why I brought them with me; heavy-weight long underwear under my pants, a wool long underwear shirt topped by a capilene zip turtleneck covered by my lightweight fleece hoody and covered that with a heavy fleece jacket. On top of all this went my stylish green rubberized rainpants and raincoat. On my feet I wore a good pair of wool socks under my rubber xtratuf boots. I was ready for a day in the rain and mud.
I am one of those people who are fascinated by weather--so I carry a pocket-sized weather station to check the daily temperature and wind speeds. Today's temperatures reached a high of 50F late in the afternoon, but most of the day it was between 40 and 45F. The wind was pretty consistent, fluctuating between 5 and 15mph. While that doesn't sound all that windy, it's just enough to make you notice that "Hey, it's pretty darn windy!". Luckily, our site is covered with a nylon rainfly that keeps some of the rain away. Of course, even this couldn't compete with the sideways rain and mist that was propelled by the breeze.
But, the work must go on. When you have a limited number of days to do as much work as possible, you work--no matter what the weather.

Today I helped Ian document soil profiles in the section I helped excavate. Ian is a geo-archaeologist--his work focuses on combining information about the geology and soils of a site with the artifacts that are found. By combining this information you can add still more data to your story; soils can tell you a lot about past climactic conditions. The study of soil science is called agronomy--today was a great time to try to remember the agronomy course I took in 1974! The specific soil language and tests were somewhat familiar, even though I hadn't really used that information much since taking the class. It just goes to show you that you never know when a class you took just because it sounded interesting might actually come in handy! Who knew that I might have to remember what a silty clay loam soil was like?
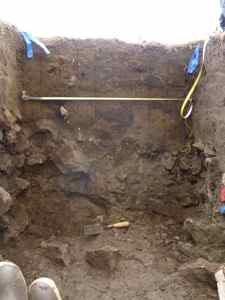
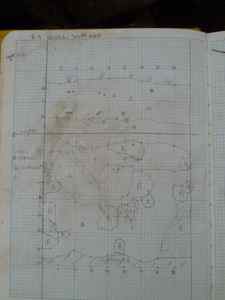
We started out on the south wall of the section, using a level and a trowel to designate vertical sections that were 10 cm wide. I created a grid in a notebook and then the fun began. Ian marked off the distinct soil layers on the wall and read me the coordinates at each 10cm interval. I transposed these points onto my grid in the notebook. Once the layers were marked on the grid, it was time to draw in the rocks and other important features. Each rock was marked on the grid using a measuring tape and figuring out the coordinates. We also marked a feature called a krotavina--soil deposition from burrowing mammals such as lemmings or voles. (According to Natasha, the name is derived from the Russian name for mole) That soil has been transported from other layers as they burrow through the ground.

Once the map was completed it was time to write more detailed notes about the soils in each layer. If you look at a smooth wall in a cutbank you can see subtle changes from top to bottom in the soils. There are differences in texture and color that become apparent if you just take time to look. Soil is made up of three components--silt, clay, and loam--in a variety of combinations, as well as organic material. The designation of silt, clay, or loam is based on the size of the soil particle. You can have a silty clay loam or a clay loam or any other combination depending on the percentage of each particle.

Ian used some very basic tests and tools that are easily done in the field. The primary texture test is done by adding water to a handful of soil to cerate a small mud ball in your hand. Then you push the ball with your thumb to create a ribbon of dirt and see how long the ribbon can be made before it breaks. Sandy soil does not stick together nearly as well as soils with silt and clay in them, so the ribbon will break far sooner. You can also test for soil 'stickiness' by adding more water to the sample in your hand and smushing it around a bit--does it feel slippery or gritty? We also categorized the soils using a Munsell Color Chart. This series of charts sorts soils according to soil color, giving you a specific 'name' for that sample. Ian also used some hydrochloric Acid to determine the presence or absence of calcium carbonate in the soil. If it is present, you will get a bit of a fizz when a few drops are put on the sample. Since this area has limestone, and limestone contains calcium carbonate, it is a good test to help determine the 'parent material' or rock from which the soils have been derived. We completed the same series of tests for each soil layer.
Each wall took a couple of hours to profile. When completed we had a schematic map as well as a page of detailed notes with the testing data and lengthy descriptions. Ian will take these maps back to his lab at Central Washington University and scan them into a computer. Then he will use Adobe Illustrator to trace over the lines and create color profile maps for each wall that can be included in the long-term data for this site.

The best thing about extreme archaeology?? No mosquitoes. Luckily, we don't have extreme mosquitoes!


Comments